Lemon Bars


I like you, a shop here in Minneapolis that sells handmade goods from local and regional artists had copies of this print in their shop recently:

Image

Image from Etsy

I’ve always loved this print because it’s so true – there’s nothing that a lemon bar can’t fix.  That and because my absolute favorite VVG recipe from Grandma has always been lemon bars.  Life hasn’t been giving me many lemons to speak of lately, but that didn’t stop me from making three batches of these to celebrate the end of the spring semester.  I brought them in for one my classes this semester and promised my students that I would post the recipe.  It’s a little late in coming to them, and to you, but I hope you’ll all enjoy some lemon bars soon!

Lemon Bars
1 c. butter
2 c. sifted flour
1/2 c. sifted powdered sugar
4 eggs
2 c. sugar (you can reduce this by half and still be adequately sugared up, I promise)
1/2 tsp. salt
2 tsp. grated lemon rind
1/2 c. lemon juice
1/4 c. sifted flour
1 tsp. baking powder

Preheat oven to 350˚.  Cream butter.  Add flour and powdered sugar and mix.  Press into the bottom of an ungreased 9″ x 13″ pan.  Bake for 20 minutes.

Combine well beaten eggs, sugar, salt and lemon juice.  Mix together baking powder and flour and add to egg mixture and mix well.  Spread on the hot crust layer.  Bake for 30 minutes.  Cool completely. Cut into squares and sprinkle with powdered sugar.

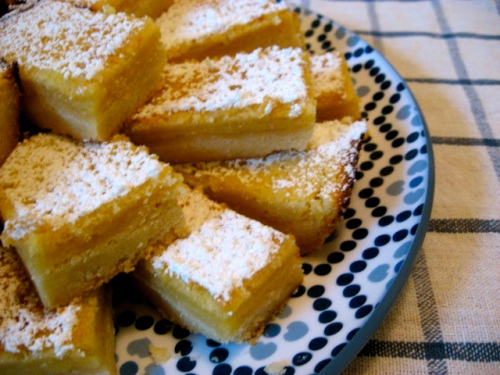
lemon bars

Plum Puffs – Anne of Green Gables style


Last weekend I hosted the nerdiest event of 2012 – an Anne of Green Gables tea party.

That’s right.  4 grown women.  Tea.  Egg-salad sandwiches.  Chicken salad sandwiches.  Biscuits and jam.  Cookies.  Plum puffs.  A viewing of the 1985 Anne of Green Gables film.

Growing up with four younger brothers, I never really got into the tea-party scene.  I had to wait until I was an adult to meet my kindred spirits (aka, fellow nerds) to fully enjoy such an event.

And by enjoy fully, I mean to say that we drank cordial (or something like it, anyway).  Okay, so it wasn’t raspberry cordial as in the Anne book (nor plum wine for that matter), and we certainly didn’t gulp it down like that greedy Diana, because at our age, we’re slightly more civilized.  And by slightly, I mean to say that for our next viewing, we have a better approach to drinking it (anytime Anne is in “the depths of despair”….drink!!).

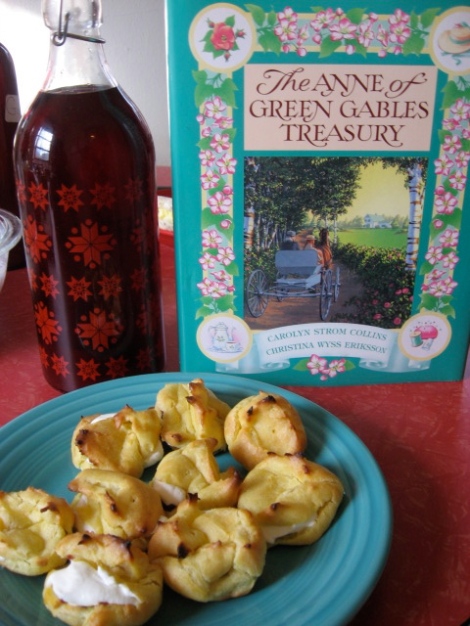
I made these plum puffs long before my mom allowed me to drink cordial.  In my memory I remember these being really putsy, but maybe it’s just because I was young and didn’t know my way around a kitchen well yet.  In any case, I was quite happy to make these little delicacies again.  They were quite yummy, even with my substitution of blackberry jam.  Whether you’re an Anne fan or not, you should bake a batch of these up.

Plum Puffs (from the Anne of Green Gables Treasury)
1/2 c. water
3 Tbsp. butter
1/2 c. flour
1 tsp. granulated sugar
2 eggs
1/2 c. plum jam
1/2 c. whipped cream

1.  Preheat oven to 425˚.  Grease a baking sheet lightly.
2.  In a large saucepan, heat the water and butter until boiling.  When the butter has melted, turn the heat to low, add the flour ans sugar all at once and mix them in thoroughly with a wooden spoon.  Continue to beat the mixture over low heat until it leaves the sides of the pan, about 1 minute.
3.  Remove the pan from heat.  Add one egg and beat the mixture until it is smooth.  Add the second egg and beat again until smooth.
4.  Drop the dough by teaspoonfuls onto the baking sheet, about 2 inches apart; they should be about 1 inch around.  Bake for 15 – 20 minutes, or until golden-brown.
5.  Take the puffs out of the oven and turn the heat off.  Close the oven door.  With a toothpick or think skewer, poke a tiny hole or two in each puff to let the steam out.  Return the puffs to the turned-off but warm oven for about 5 more minutes to ensure that the insides are done. Remove puff from the oven and cool on a rack.
6.  When cool, gently split the puffs in half and fill each one with a spoonful of jam and a bit of whipped cream.

Makes about 18 delicious little puffs.

Image


Le Pot-au-feu


Do you remember the end of November?  You know, when it was in the upper 20s, low 30s and we all put on our hats and mittens and scarves and pretended it was winter?  But really, you know, it wasn’t.  Now this weather, this is winter weather.  This is the winter weather where I put on my hat and my mittens and my scarf and all you can see is the whites of my eyes.  This is real.

And this cold winter weather is the perfect time to enjoy Le Pot-au-feu.  Mon bf made this dish for me at the end of November, when we still just pretending it was winter.  But I know the weather we’re experiencing now is more what he had in mind to accompany this very hearty winter dish that he used to enjoy in France.  And now, I share with you his description of his mother’s recipe so that it will warm you up this weekend!

Le Pot-au-feu (from mon bf)
“Pot-au-feu” can be translated as “pot on the fire”.  It is a very simple winter dish made from vegetables and beef and is a great way to prepare a broth that is particularly enjoyable during cold days.

The bravest of you can try the bone marrow on bread which can be part of the recipe. You might also want to enjoy the broth with the ancestral tradition of “faire chabrot” – aka – pouring red wine in your broth before finishing your bowl.

“Faire chabrot” is often regarded as a poor men/farmer’s tradition, not acceptable in the high society.  Which is precisely what Alyssa and I are so keen to do it (Alyssa is, after all, a farmer’s daughter!). Regardless of any social context, you might want to try this experience for the great taste it has.

Details:
For 4 persons
Difficulty : extremely simple
Time : preparation 30 minutes, cooking 3 hours.
Cost : moderate

Ingredients:
chuck roast 2 pounds ($9)
vegetable ($10)
3 carrots (baby carrots left unchopped are find)
1 onion (whole)
4 potatoes (cubed)
2 leeks (sliced)
3 turnips (cubed)
2 bones with marrow (optional)
garlic, salt, pepper, clove

tomato sauce ($3.8) and 1 sliced onion.

Directions
Put the chuck roast in a large pot and cover it with water. Upon heating and boiling, foam might form at the surface and has to be removed. When there is no more foam, add the peeled vegetables, one peeled (entire) onion pinched with clove.  Add more water to cover ingredients. Caution! Too much water will give a weak tasting broth. Add salt, garlic and pepper according to your taste. Keep at a gentle boil for 3 hours. (optional, add the bones with marrow after 2 hours).

Meanwhile you can prepare a tomato sauce with the remaining sliced onion. In addition to a tomato sauce, the Pot-au-feu is often appreciated with Dijon mustard and pickles.

After 3 hours, the meat and vegetable are taken out of the broth and are ready for eating.

The broth can be served as a starter after the fat has been removed from the surface. As strongly suggested earlier, the great “faire chabrot “ tradition is possible.

For the fearless of you interested in the bone marrow, the bones that were added after 2 hours and cooked for about 1 hour helps to keep the marrow in the bone so it is not lost in the broth. Take the hot marrow from the bone with a knife and spread it on (toasted) bread and add salt to your taste. Enjoy!!
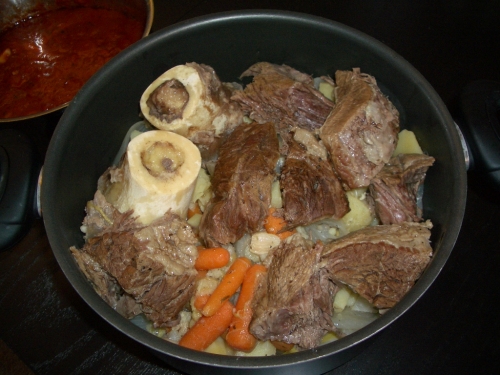
Pot-au-feu

See those bones and the marrow? It's going to be soooo gooood!
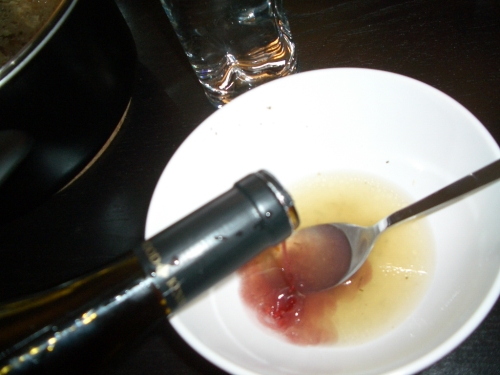
Pouring wine in the broth

Why are you being so polite? “Faire chabrot” Add some wine first.
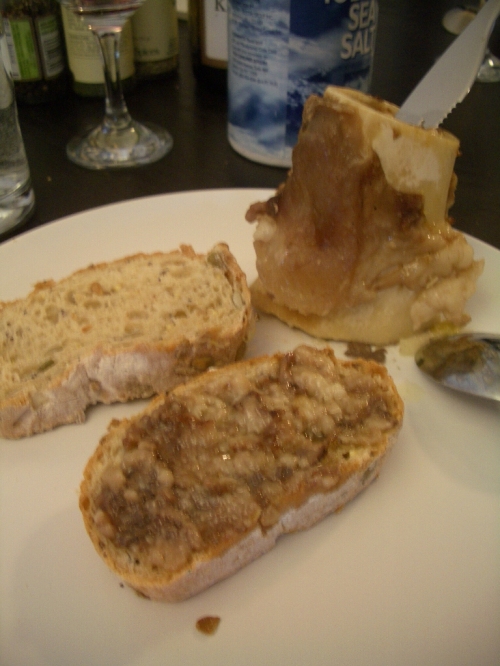
Marrow on bread

Marrow from the bone.

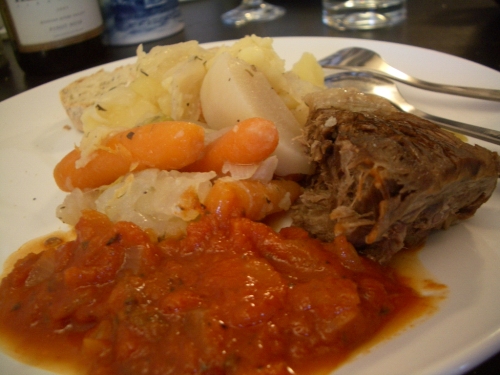
Le Pot au feu with tomato sauce

The meat and vegetables with tomato sauce to complete your pot-au-feu experience!

Carrot and Sweet Potato Soup


This was a wonderfully food-filled Thanksgiving weekend.  I made the trek back to the motherland for some delicious turkey on the grill, maple-glazed brussel sprouts, roasted sweet potatoes, corn-bread stuffing, cranberry-cherry chutney, home-baked dinner roles and maple-pecan and pumpkin pie.  Earlier today, I dined on some delicious pot-au-feu (recipe to follow later this week, I hope).  Tonight, I wrapped up my incredibly relaxing holiday weekend with this carrot and sweet potato soup.

First, I have to tell you that it was not my intention to make this soup.  I was intending to make Moroccan carrot soup instead.  But alas, it turns out I didn’t have enough carrots and I wanted some leftovers to get me through the first half of this week’s lunches.  So, this slightly heartier soup was born.  Find some delicious bread to go with it, and you’ve got yourself a wonderful winter meal!

Carrot and Sweet Potato Soup
1 Tbsp. olive oil
1 onion, chopped
2 c. carrot, sliced
1 medium-large sweet potato, cubed (about 3 cups)
2 cloves garlic, chopped
1 1/2 tsp. minced ginger
1 tsp. cumin
1 Tbsp. 33rd and Galena Penzey’s Spice Mix **
1 Tbsp. rice wine vinegar
1 Tbsp. soy sauce
2 Tbsp. peanut butter
4 c. water
1 14oz can coconut milk

Saute onions and garlic in oil until onions are translucent.  Add carrots, sweet potatoes, ginger and dry spices, and mix until coated.  Add water, soy sauce and rice wine vinegar; bring to a boil and then reduce to a simmer.  Simmer for 20 minutes, or until carrots and sweet potatoes are soft.  Stir in peanut butter.  Transfer mixture to a food processor and puree until smooth.  Return to low heat and stir in coconut milk.  Serve with bread and enjoy!

**The 33rd and Galena spice mix was included in a very kind gift I received from my aunt this week.  As I was cooking the soup, I realized it was lacking something.  Aunt J. to the rescue with a little Penzeys!  The pepper and nutmeg in this mix gave just the warmth we were looking for!

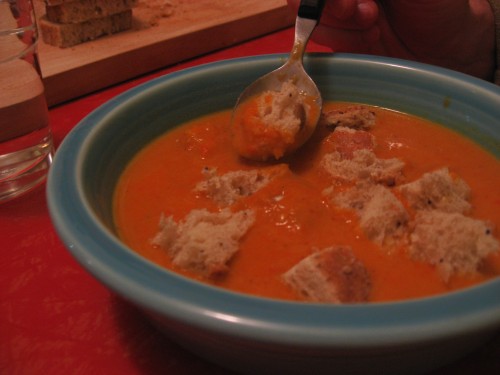
Carrot Sweet Potato Soup

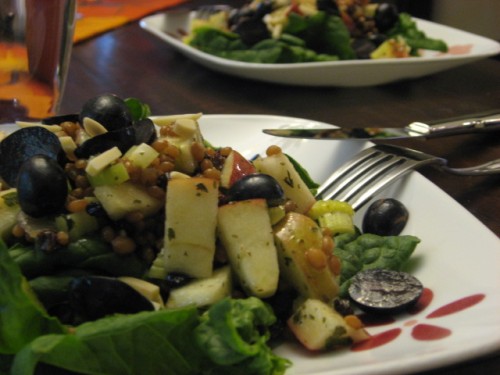
Wheat Berry Waldorf Salad


The wheat berry is one of my favorite grains so I was excited to try out this Waldorf Salad recipe I discovered in the November / December issue of Midwest Living.  I brought it over to my friend’s today for lunch and we both agreed it was pretty good.

There are a lot of pretty good recipes and stories in this issue of Midwest Living, actually.  One of my favorites is a story of a Christmas cookie – Date Pinwheel Cookies – featured on page 26 by a Minneapolis blogger.  Oh wait!  That blogger is me!  I was pretty honored to be asked to contribute a story for this issue of the magazine and I think that my grandma would be pleased as punch to see one of her recipes in a glossy magazine, even if she never would have submitted it herself.

In any case, if you’re looking for some tasty, Midwestern holiday recipes, whether they be cookies or grain salads, you’ll want to check out this very special (at least to me!) issue of Midwest Living.

Wheat Berry Waldorf Salad (from Midwest Living)
2 1/2 c. water
3/4 c. wheat berries, rinsed
1/3 c. olive oil
1 Tbsp.  dried parsely
1/4 c. apple cider vinegar
1/4 c. lemon juice
1 Tbsp. sugar
1 tsp. salt
1/4 tsp. ground nutmeg
2 large apples, chopped (ML suggests one Granny Smith and one Braeburn; I used one Fireside and one Honeycrisp)
1 c. chopped celery
1/2 c. dried currants (or cranberries, cherries or raisins)
1/2 c. grapes, halved
4 Tbsp. slivered almonds
spinach

1.  In a small bowl, combine the water and wheat berries.  Cover and chill in your refrigerator for 6 to 24 hours.  Do not drain; transfer to a medium saucepan.  Bring to boiling and then reduce to a simmer, covered for 30 mins or until tender with a chewy texture.  Drain and cool.  (I admit, I forgot to do this step and just cooked the wheat berries, sans soaking.  I think they’re fine.)
2.  Prepare the dressing.  In a screw-top jar, combine oil, parsley, vinegar, juice, sugar, salt and nutmeg.  Drizzle dressing over wheat berries, stirring to coat.
3.  In a large bowl, toss apples, celery, cranberries, and grapes.  Stir in wheat berry mixture and mix well.  Serve immediately, or chill for up to 4 hours.
4.  Serve over a bed of spinach and garnish with almonds.


Grandma’s Gingerbread


Where are the posts?  How’s October Unprocessed coming?

Well, the posts have been a little slow to come not because I haven’t been cooking, but because I’ve been spending most of my weekends sewing up a LBD for my friend’s wedding.  More on the dress, the wedding and some food on another day though!

As for how October Unprocessed is going.  Well…ok?  Everything I’ve made in my own home this month has been unprocessed.  But everything I’ve eaten? Far from it!  Last weekend, for example, I was in Des Moines for a conference. I’m pretty sure the brownies I ate for lunch were laden with processed sugar.

So, yes, eating unprocessed foods isn’t too difficult when I’m in control of the ingredients, but it is a bit trickier when I leave home.  Which, you know, I like to do.  Every day.  But really, the biggest challenge this month was to find one of my grandma’s VVG recipes to make that didn’t contain any ingredients that were processed.  You see, two years ago in October, my grandma passed away so I wanted to make something to remind me of her.  I’ve noticed a lot of people checking out the Apple Kuchen recipe lately – so if you made it, I hope you enjoyed every sugary morsel of it.

I was able to slightly adapt my Grandma’s Gingerbread (which she credits to the Grandma’s molasses bottle) recipe to fit the #unprocessed bill though.  I even baked them in cupcake form so that I could freeze a few and enjoy them later this fall.  Which I think is a VVG idea!

Grandma’s Gingerbread
1 stick butter
1/3 c. honey
1 c. molasses
1 egg
2 1/2 c. flour
1/2 tsp. salt
2 tsp. baking powder
1 tsp. baking soda
2 tsp. ground ginger
2 tsp. cinnamon
1/2 tsp. cloves
1 c. boiling water

Heat over to 350 degrees.  Beat butter with honey and molasses.  Mix in egg.  Sift dry ingredients and then add to wet mixture alternately with water until just combined.  Bake in cupcake tins (20 – 25 mins) or greased 9″ pan (40 mins).

Yum!

Grandma's Gingerbread

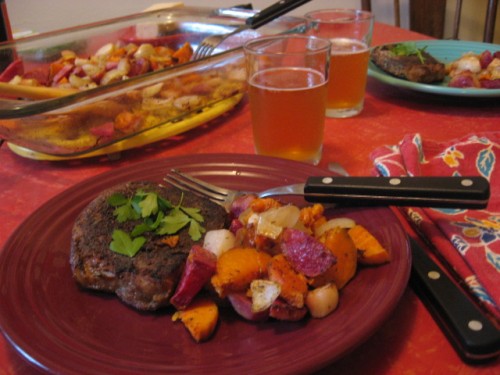
Molasses-Brined Pork Chops


Hark!  What is this you’re reading!?  A new entry on VVG?

Believe it.  Today, I bring you pork.

I don’t have any really good excuses* for not posting for the past couple of months, except that I just don’t enjoy cooking or baking in my Barbie-sized kitchen during the summer.  But now that fall is here, or at least according to the calendar, I’m back in the kitchen a bit more.  Plus, my neighbor convinced me to do the October Unprocessed food challenge so clearly, I need to be in my kitchen pretty regularly now.
*I did have food poisoning back in August but I didn’t think you’d need to read my interpretation of cinnamon toast for a week.

So, what is this October Unprocessed food challenge, anyway?  Does it involve maple syrup?  In answer to the first question, basically, if it’s something that you could theoretically make in your own kitchen, it’s fair game for food consumption.  If food requires some sort of chemical process to come about (ie. sugar or corn syrup) it’s out.  Therefore, the answer to the second question is a resounding YES!  Maple syrup is in.  I can proceed!

Although recipe does not feature maple syrup, I assure you that these pork chops are still good.  They will definitely warm you on a cool fall day.  I thought they were a little too salty so I would reduce the salt in the brine next time, but I know Grandma would approve of this recipe just as it’s printed below.

Molasses-Brined Pork Chops (From November, 2003 Cooking Light)

Brine
3 1/2 c. water
1/4 c. kosher salt
3 Tbsp. honey
2 Tbsp. molasses
1 c. ice cubes
4 pork chops

Rub
1 Tbsp chopped fresh sage
2 tsp. ground pepper
1/2 tsp. ground cloves
1/2 tsp. ground nutmeg
1/4 tsp. cardamon
1/4 tsp. cinnamon
3 garlic cloves, minced

For cooking
2 Tbsp. flour
2 tsp. olive oil

Step 1:  Prepare the brine.  Dissolve salt in water.  Stir in honey and molasses.  Stir in ice.  Add pork chops, cover and refrigerate for 8 hours or overnight.

Step 2:  Remove chops from brine and pat dry.  Discard the brine.

Step 3:  Combine rub ingredients and rub over both sides of chops.  Refrigerate for 30 minutes.

Step 4:  Place flour in a shallow dish; dredge chops in the flour.  Heat oil in a large nonstick skillet over medium-high heat.  Add chops and cook for 5 minutes on each side or until done.  Molasses-Brined Pork Chops

Grilled Peach and Red Pepper Salsa


I don’t have a good story to go with this recipe so I’ll keep it short and sweet and instead suggest that you run to your local grocer, farmer’s market or garden and collect the ingredients listed below.  Then, chop quickly so you can do your cooking out of doors and enjoy the fruits of your labor!

Grilled Peach and Red Pepper Salsa (adapted from Epicurious)
2 Tbsp. olive oil
3 Tbsp. fresh basil, finely chopped
2 Tbsp. fresh mint, finely chopped
1 clove garlic, minced
3 small peaches, halved or 2 large
1 medium to large red bell pepper, quartered
2 rings purple onion
1 Tbsp. apple cider vinegar

Mix oil, garlic, basil and mint together.  Brush peaches with oil mixture and grill cut side down over a medium high heat 5 – 8 minutes, or until just browned.  Remove from grill and cool.  Brush onions with oil mixture and grill until done, about 5 – 10 minutes.  Brush pepper with olive oil and place peel side down on grill.  Grill for 8 – 10 minutes, or until peel is blackened.  Place pepper in a paper bag for 10 minutes.  Peel skin off.
Cut peaches, pepper and onion into 1/2″ cubes.  Put cubed fruits and vegetables in oil mixture.  Add vinegar and refrigerate for at least 2 hours.
Serve over grilled chicken or enjoy with chips.

If you can’t take the heat…make Cranachan


I suppose getting out of the kitchen would be an option, but what fun would that be?  I know some people who decided that the best way to survive this heat wave was to buy an air conditioner.  (Apparently this is what people do when they become empty nesters.)  I suppose that’s a solution as well, but not as creative as eating your way to a cooler self.

For example, back in the days before my parents had air conditioning (such as when their five children resided with them) the solution was not to give in and buy an ac unit.  No, the solution was to pack all the kids in the minivan and take a drive in the countryside with the ac on full blast.  The ride usually ended up at the Dairy Queen in Mosinee with a round of root beer floats for dinner.  Was the house still hot upon our return?  I don’t remember, to be quite honest, because the wonderful memories of those car rides and root beer floats far outweighs my recollections of a hot and sticky house.

Well…that’s not entirely true.  As I sit here typing up this little blog post, in my sweltering city dwelling – sans AC – with sweat dripping off of me, the memory of a hot and sticky house seems a little too close for comfort (and now that I’m typing, the memory of milking cows and baling hay in this weather suddenly makes me thankful for my sweltering city dwelling!).  But thank goodness I was raised with the good sense to at least get a car with AC and to eat my way to cooling comfort when necessary.

Which brings me (finally!) to today’s recipe.  Nope, it’s not a root beer float, but instead a refreshing dessert that features whipped cream, honey, raspberries and WHISKEY.  My friend and I tried this while on our trip to Scotland and I’ve been waiting for the perfect time to make it.  The perfect time is now!  No baking required, my friends!  Eat your way to comfort!!

Cranachan
1 pint heavy whipping cream
2 Tbsp. single malt whiskey
2 Tbsp. honey
1/2 pint raspberries
2 – 3 tablespoons oat bran (Scottish oatmeal is more like steel cut oats, which I don’t have.  Regular oatmeal just isn’t right.  So, I used oat bran and it was good)

Step 1:  Whip cream until soft peaks form.  Add whiskey and honey and fold in.
Step 2:  Rinse and dry raspberries.  Place a few at the bottom of each glass (I used 3 martini glasses; adjust to your preferences!).  Reserve about 10 for the top.  Fold remaining raspberries into whipped cream deliciousness.
Step 3.  Layer whipped cream mixture over raspberries in glasses.  Cover and chill for at least 2 hours or overnight.
Step 4.  While Cranachan is chilling, toast oat bran in a skillet, about 5 mins.  Set aside to cool.
Step 5.  Sprinkle toasted oat bran over whipped cream and top with remaining raspberries.
Step 6.  Eat your way to coolness, Scottish style!

Cranachan in martini glass

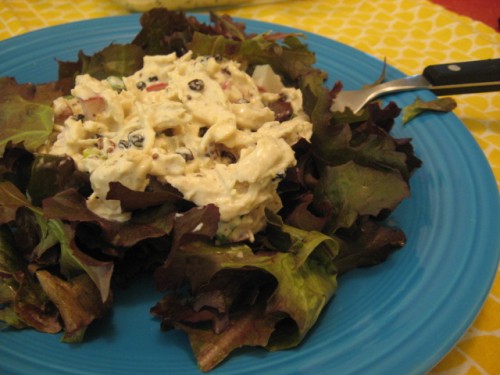
Chicken Salad


A few weeks ago my friend and I went out for dinner and she proclaimed that she was on a chicken salad kick (she’s since moved on to French dips, oh well).  I don’t order chicken salad very often because it’s usually just a little too goopey for my tastes, but then I ran across this recipe in Cooking Light and thought I’d give it a whirl.  The poached cooking method for the chicken was perfect.  Plus, with a few adaptations, it was a great way for me to use up some CSA goodies.  I think now I’m on a chicken salad kick!

Chicken Salad (adapted from May 2011 Cooking Light)
2 pounds skinless, boneless chicken breast halves
1 c. chopped radish
1 c. chopped green onion
1/4 c. dried currants
1/3 c. coarsely chopped almonds

Dressing
1/2 c. mayonnaise
1/2 c. plain yogurt
1 Tbsp. lemon juice
1 Tbsp. white wine vinegar
1 Tbsp. Dijon mustard
1 tsp. honey
salt and pepper to taste

Step 1: Fill a stockpot two-thirds full of water; bring to a boil.
Step 2:  Wrap each chicken breast half completely and tightly in heavy-duty plastic wrap. Add the chicken to boiling water. Cover and simmer for 20 minutes or until a thermometer registers 165°. Remove from pan, and let stand for 5 minutes. Unwrap chicken and shred; refrigerate for 30 minutes or until cold.
Step 3:  Combine dressing ingredients in a large bowl, stirring with a whisk. Add chicken, radishes, onions, currants, and almonds; toss well to coat. Cover and refrigerate for 1 hour. Serve over salad greens.

Chicken Salad